
Beginning Steps to Headstands
Beginner Growth Series – Beginning Steps to Headstands
By Laura Jones-Miller
Part One Teddy Bear Tripod
by LAURA MILLER
I know when you read the title of this Growth Series you will howl with joy. This is the circus part of the show we have all been waiting for!!!
I remember, as a new student, how excited I was when we got to the inversion part of class. I know it is against some yoga dignity rule to want to do the circus-like acts…But I definitely remember thinking, “Shoot-Howdy!!! Now we’re getting down to business!!!!!!!!”…We all want to learn it because it’s fun…also because it feel like some “Yoga Rite of Passage”…So, without any further adieu…off we go into the wondrous world of HEADSTANDS…
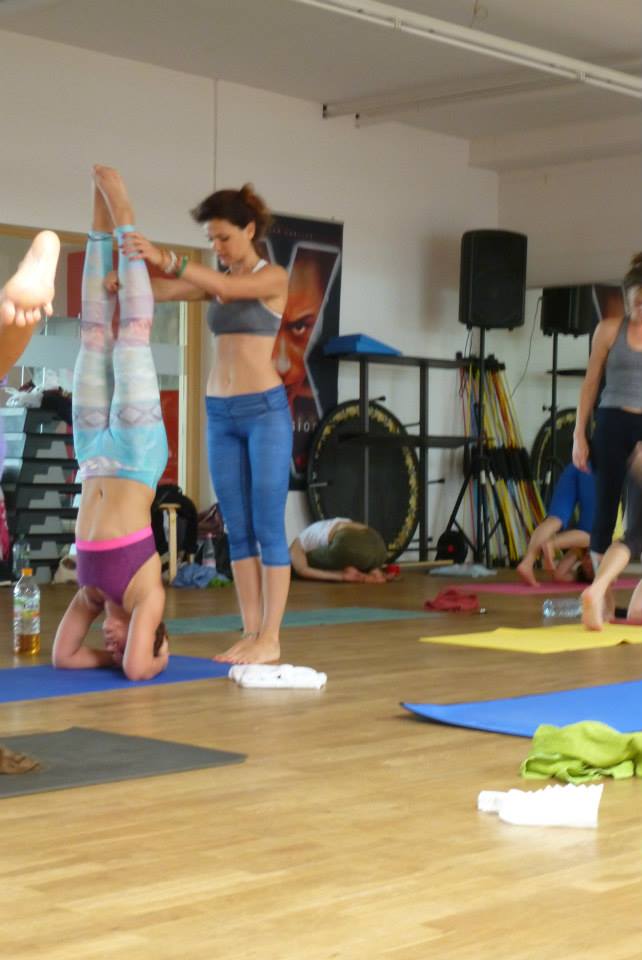
Beginning Steps for The Teddy Bear Tripod Stand
Only try this if you have never had problems with your neck.
We are going to start with a Teddy Bear Tripod Stand in order to feel more comfortable in the upside down, or inversion position.
On your hands and knees, bring the crown of your head to the ground. With your palms flat and near your head, bring your hands away from your face…this will create the ‘tripod’ between the head and hands. Your forearms will be at an equal position (perpendicular) to the ground. Lift your knees up and walk your feet in. Stay here for a few breaths breaths. You can start by just getting the alignment at first and then hold for 1-5 breaths for a few weeks, even months before proceeding with more than 5 breaths.
When your feet are in as close as possible and your booty is aligned on top of the head and the shoulders slowly draw one knee, and then the other knee to rest on top of your triceps (teddy bear headstand). Stay here for 1-5 breaths. You should be proficient in the Teddy Bear Tripod before moving into the fully extension of this posture.
BEGINNING STEP TO HEADSTAND – Part One
I know after what I said above…I will have to give you the dignified introduction to learning yoga headstands and inversions…And that is that there are no short cuts in yoga ( :/ )…Our goal as yogi is not to be good at yoga, but to DO yoga…to let growth happen as a result of a consistent practice. See that wasn’t so bad…Right? ( 😕 )..
All of this certainly is true. If you practice yoga consistently you will grow…you will strengthen, you will become more flexible. None of these things can be rushed…If you are very lucky…you will get to learn the repetitive postures with Ali Kamenova, who seems to have the magical ability to tweek and alter common postures into something new and exciting. If you are reading this, I will assume you know exactly what I am talking about!
yoga headstand tutorial lesson
yoga headstand tutorial lesson
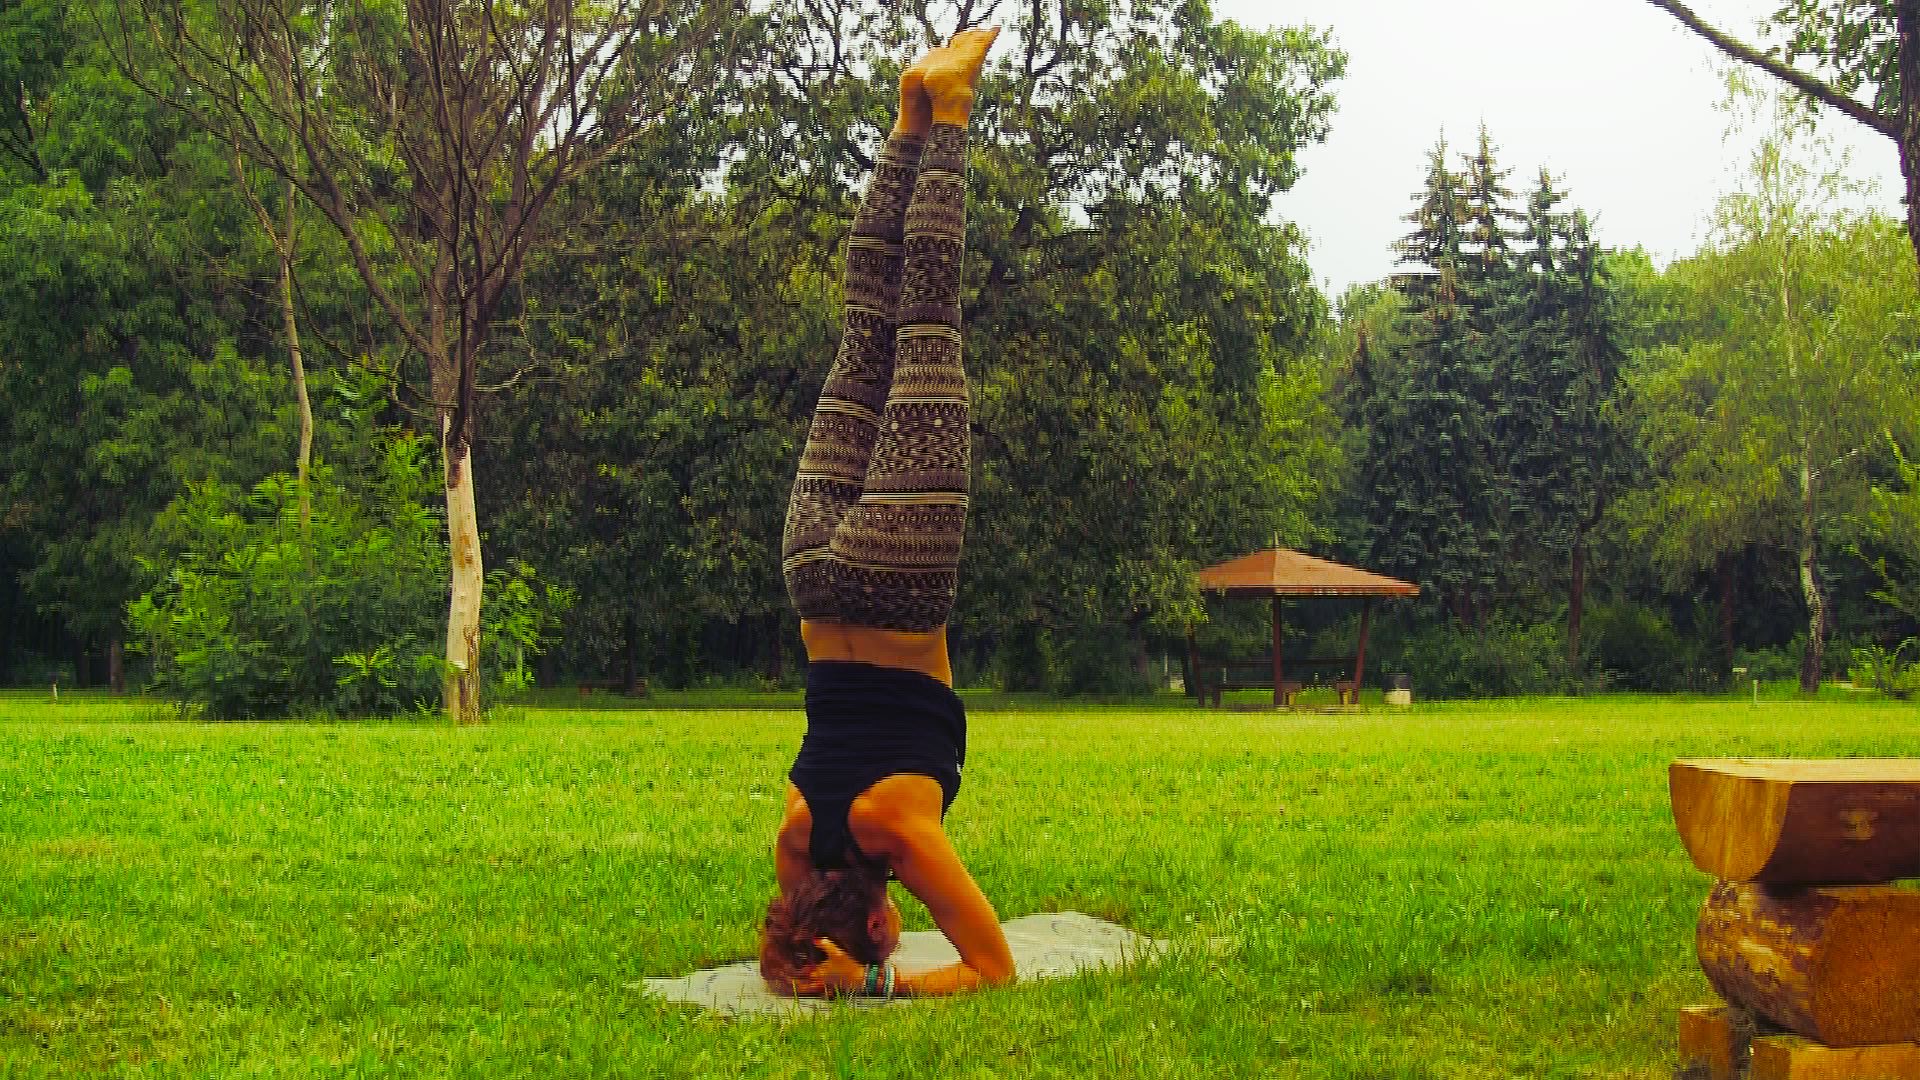
The Steps to Learning Headstand
1. Most people, when first learning headstand, want to jump/kick into headstand. The proper (and safe) ascent is to glide up using the core muscles. The weight of you body needs to be on the forearms and shoulders…not on the neck and head. Your head should be lightly on the ground so as to lift into headstand… not kick.
2. For many people, going upside down is a little scary. Many of us have a fear of falling…you will need to get past that because you are going to tip and fall sometimes in yoga…everyone does…I do…and so will you. The more you do it the less you will fall. You brain and body will eventually develop a stronger equilibrium. Some days you will have better balance than other days. The human body is effected by many, many things. After your first baby-step headstand you will begin feeling more confident and will gain more control over your body. Little by little your fear will subside. You’ve just got to get up and do it!
3. Let’s start with the forearm and cupped hand placement. Your body should be in an informal child’s pose. Cross you arms and put opposite hand on opposite shoulder with your elbows resting on the floor. This will give you an exact shoulders width placement for the forearms (precise placement really does help in making the headstand cleaner and easier). Now, lace your fingers together and for a cup to nestle the back of the head into. The strength you need for this posture is in the shoulder, neck, arms, forearms, core, back and chest…so, with that in mind, nestle the back of the head and neck into your cupped hands…Your knees and shins will be on the floor behind you. Next, FIRMLY press the forearms into the floor, tuck your toes under and straighten the legs. This is the first phase of headstand. The set-up is this postures foundation…so work at it until it feels balanced and comfortable to you.
4. Working with a wall behind you, slowly begin to walk your legs forward until you body weight is fully on forearms and your spine is vertical and straight. Push strongly into the forearms and shoulders. Using your chest and upper back strength, continue walking forward until you are on your tippy toes. You may need to stay here for a while. You should feel the core muscles fire when you get to the tippy toe part. Those are the muscles that will lift you. Hamstring flexibility is key here!!!
5. When you feel ready, draw (don’t jump) one knee into the chest with the other skimming the ground. Practice this until you feel comfortable. Now try pressing the legs together…using your core muscles try gliding both knees into the chest. It’s the strength of the upper body… squeezing the legs… pointing the toes… and keeping the body tight and firm that creates the control, which in turn creates the balance.
Yeah for you!!! You have just completed Part One in the wonderful world of Ali Kamenova inversions!!! And, as they say, “Bottoms Up” HA! xoxox, With much love, Laura
NAMASTE <3
Related Posts:
VIP Membership
Namaste Beautiful Yogis, we are starting a 30 day Abs and Core Challenge! I invite you all to join in...
VIP Membership
Meaning of Namaste A Divine Gesture In my first yoga experience I recall the solemn gesture and phrase everyone used...

VIP Membership
ODE TO LEGS Thick thighs and legs? And what to do about it 😀 by Laura Jones-Miller Legs are one...
1 Comment
Leave a Comment
You must be logged in to post a comment.

This is a perfect tutorial for anyone attempting their first or proper form in a headstand. As soon as I tried the first headstand (with wall, but actually didn’t need it) , I was surprised by my arm/core strength and it actually felt easy!! I always envisioned that there would be a lot of pressure on my head and neck, but it didn’t feel like that at all. Your yoga lessons have really strengthened my body and especially my arms and core to prepare me for this. And, your tutorial is so easy to follow and gave me confidence to try my first headstand- which was a success! THANK YOU ALI!! Namaste.